
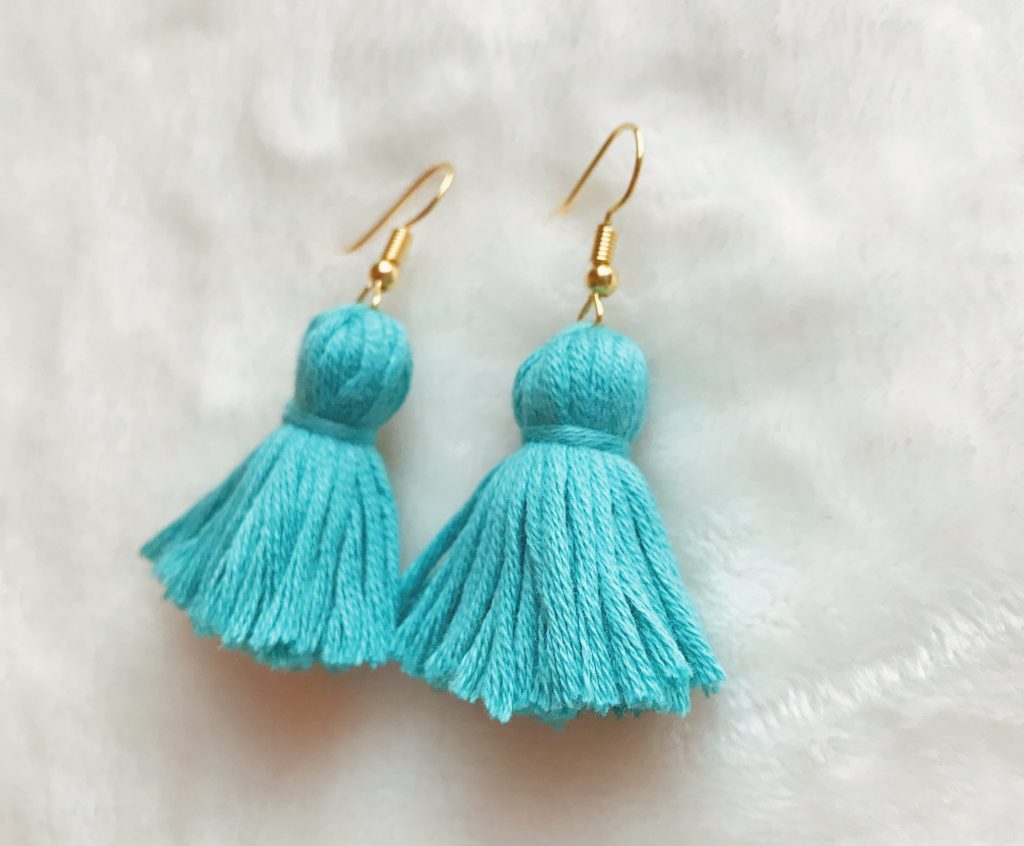
I’ve seen tassel earrings floating around for a while and I’m so in love with them. When I see things like this, you can almost guarantee I’m going to have a go at making them before I spend some pennies. I mean, YOLO, right? Plus, it’s nearly Christmas, and if there’s one thing I know all the women in my family want, it’s home made tassel earrings. Sometimes you just all have to stick together on these things.
So after doing plenty of research and finding elements of several that I loved, it’s time to get started.
I couldn’t decide what colour to go for, so I decided on two. Red and teal. I love that red/orange colour that’s popping up everywhere SO much right now. It’s just such a perfect colour for winter. Yes it’s dreary. Yes it’s effing freezing. But have you seen the colour of my jumper??? Yaaaaaassss queen.
Okay. Back to it. Making these was so simple, and it only took me 15 minutes to make a pair!
I recently stumbled across apairandasparediy.com and good Lord. As a crafty person, if “a pair and a spare” is not the motto to live by then what is?! Make a pair and a spare. It’s so perfect. You can gift them, sell them, or just hold onto them for when your ‘pair’ either goes missing or becomes a little threadbare.
So that’s what I’m doing, and I’m listing my other pair on Etsy here! And I might even make some little kits for those who love them and want a go, but don’t want to buy everything you need to make so many pairs.
So here’s what you’ll need:
- Embroidery thread/wool (I’m using organic cotton wool for this tutorial)
- A small piece of card (I used a business card and cut off a 2cm strip)
- Scissors
- A tiny plastic bobble (optional)
- Embroidery needle
- Earring hooks
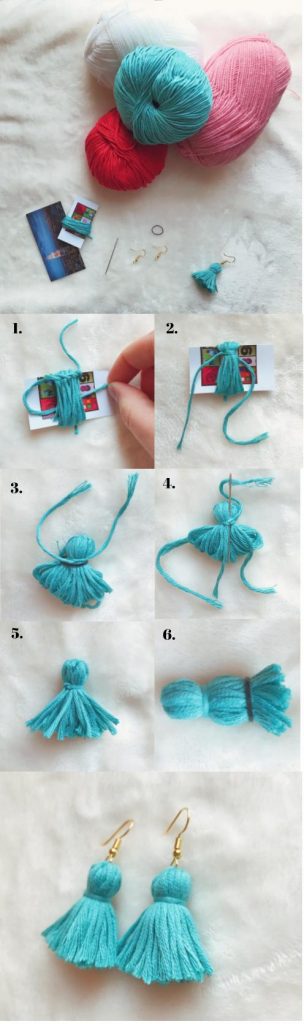 1. Wrap the wool around the card around 40 times, or until you’re happy with how thick the wool is, then cut the end in line with the bottom of the card. Cut a short piece of wool, around 12 cm long, and thread it under the wool. Loop it into a loose knot over the wool, then take the left thread and pull it under the wool so that the knot moves to the bottom of the wool and you can’t see it from the top.
2. Tie the knot as tightly as you can, then do the same thing again to ensure it’s a tight knot.
3. Slide the wool off the card. At this point I use a tiny bobble to hold all of the wool in place. Cut another piece of wool, around 12cm long, and tie a double knot around the top of the wool just above the bobble, then take the bobble off.
4. Tying the thread will probably leave one of the threads sticking up at a funny angle. So take an embroidery needle and thread it with the wool from the knot. Gently push the needle under the knot and pull it through so that the wool sits in line with the rest.
5. Cut the loops a few at a time and make sure to pull them against the scissors so that they are all similar lengths when cut.
6. The return of the tiny bobble! Pull it down towards the cut edges to hold them all together, then trim the ends to get them all level, and angle off the edge threads on the edges if you’d like a more bell-shaped tassel.
7. Attach your earring hooks, and you’re ready to go!
And there you have it. So simple. So sassy. And they’re so easy to make in lots of colours, check out my Etsy for all the colours I’ve used!


Thanks for sticking around to have a read! If you make a pair after seeing this, I’d love to see – tag me in ya insta’s @emilykar_
Yours literally,
![]()